


1.基础设置
切换到root权限
sudo -i
1.1 改主机名
查看当前主机名
hostname

修改主机名为dreamshell,重启后生效 (推荐方法一)
方法一:
hostnamectl set-hostname dreamshell

方法二:直接修改主机名配置文件
vim /etc/hostname
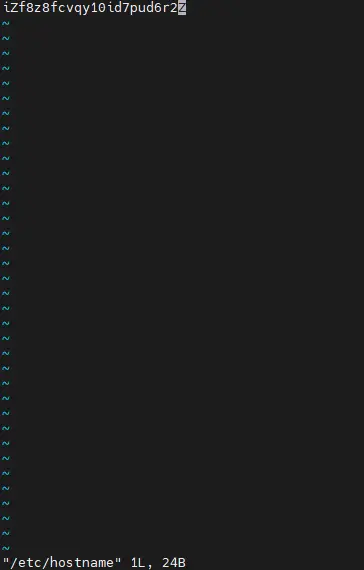
:wq //保存退出
1.2 修改源
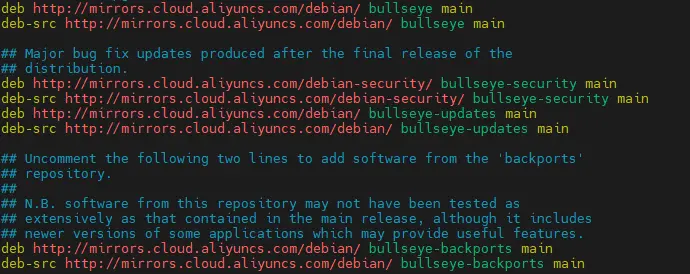
vim /etc/apt/sources.list
debian11的系统,这里替换成阿里云的源。
deb http://mirrors.cloud.aliyuncs.com/debian/ bullseye main
deb-src http://mirrors.cloud.aliyuncs.com/debian/ bullseye main
deb http://mirrors.cloud.aliyuncs.com/debian-security/ bullseye-security main
deb-src http://mirrors.cloud.aliyuncs.com/debian-security/ bullseye-security main
deb http://mirrors.cloud.aliyuncs.com/debian/ bullseye-updates main
deb-src http://mirrors.cloud.aliyuncs.com/debian/ bullseye-updates main
deb http://mirrors.cloud.aliyuncs.com/debian/ bullseye-backports main
deb-src http://mirrors.cloud.aliyuncs.com/debian/ bullseye-backports main
:wq 退出
1.3 更新系统安装包
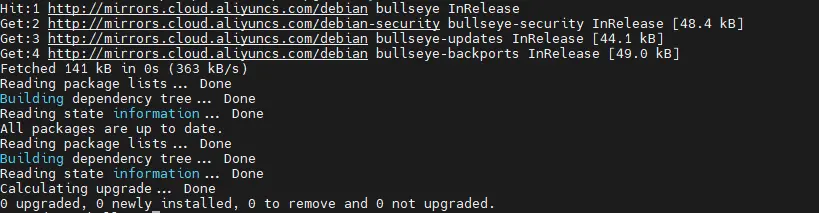
apt update && apt upgrade -y

apt install wget curl sudo vim git unzip -y  # Debian 系统比较干净,安装常用的软件
1.4 网络加速
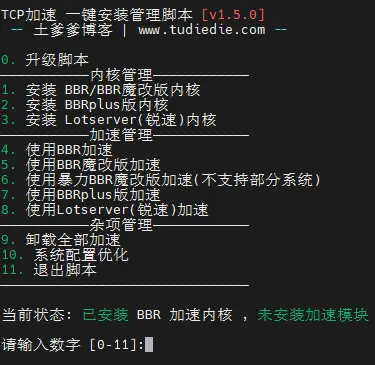
1.4.1开启bbr
BBR是 Google 提出的一种新型拥塞控制算法,可以使 Linux 服务器显著地提高吞吐量和减少 TCP 连接的延迟 ,可用于KVMXen架构,不兼容OpenVZ(OVZ)。
支持Centos 6+ / Debian 7+ / Ubuntu 14+,BBR魔改版不支持Debian 8,内核≥5.5推荐用自带bbr。
长期稳定推荐采用BBR + FQ,追求性能推荐用BBR2 + FQ_PIE。详细比较内容见《》
在安装BBR时,不卸载内核版本,则执行命令:
wget -O tcpx.sh "https://github.com/tudiedie/Linux-NetSpeed-TuDieDie/raw/master/tcpx.sh" && chmod +x tcpx.sh && ./tcpx.sh
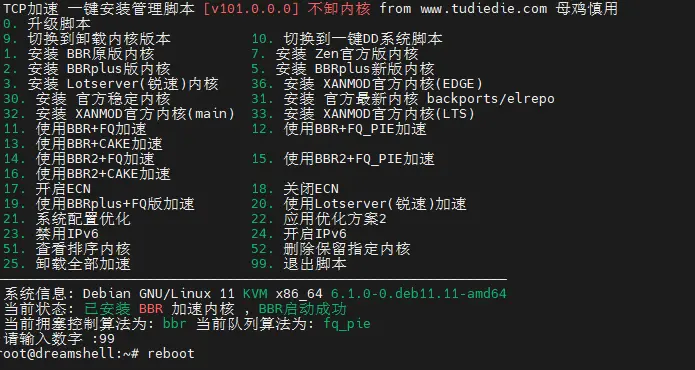
这里直接用自带的内核,选择11即可
如果要替换内核,可以按照提示选择,默认会从高版本内核启动,不会删除原先内核。
选择52,可以删除其他不需要内核。
BBR2的内核集成在XANMOD内核当中。
选择9会跳到另一个内核安装脚本,该脚本会直接删除旧内核,安装新内核。
安装完毕后,重启一下机子
1.4.2 安装fastgithub
国内大部分服务器无法访问github,或者即时能访问也是速度慢,时灵时不灵的。需要给github加速一下。
一般有四种方法,这里用fastgithub。其他方法见《》
一步安装法:
# 合并为一行命令
wget -c -O /opt/fastgithub_linux-x64.zip https://gitee.com/chcrazy/FastGithub/releases/download/2.1.4/fastgithub_linux-x64.zip &&
unzip -d /opt /opt/fastgithub_linux-x64.zip &&
rm /opt/fastgithub_linux-x64.zip &&
/opt/fastgithub_linux-x64/fastgithub start
分步安装法:
# 下载FastGithub Linux版安装包到opt目录
# arm版本需要下载 fastgithub_linux-arm64.zip
 wget -c -O /opt/fastgithub_linux-x64.zip https://gitee.com/chcrazy/FastGithub/releases/download/2.1.4/fastgithub_linux-x64.zip
# 解压
unzip -d /opt /opt/fastgithub_linux-x64.zip
# 删除FastGithub Linux版安装包
rm /opt/fastgithub_linux-x64.zip
# 切换目录
cd /opt/fastgithub_linux-x64
# 以systemd服务安装并启动,即开机自启动
sudo /opt/fastgithub_linux-x64/fastgithub start
# 卸载服务
# sudo /opt/fastgithub_linux-x64/fastgithub stop
# 手动启动
# sudo /opt/fastgithub_linux-x64/fastgithub
sudo ./fastgithub start
以systemd服务安装并启动,即开机自启动
这样就算成功了:

设置代理
1.4.2.1 手动修改 /etc/profile文件
手动修改代理,在/etc/profile 添加
vim /etc/profile
添加下面代码
export http_proxy=http://127.0.0.1:38457
export https_proxy=http://127.0.0.1:38457
:wq 保存
source /etc/profile #更新shell
/etc/profile 开机重新会自动加载
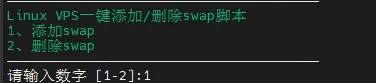
1.5设置swap
wget -O "/root/swap.sh" "https://raw.githubusercontent.com/BlueSkyXN/ChangeSource/master/swap.sh" --no-check-certificate  &&
chmod +x "/root/swap.sh" &&
chmod 777 "/root/swap.sh" &&
bash "/root/swap.sh"
选1,输入大小(MB),一般为物理内存的1.5-2倍。
内存 <= 4g:Swap 至少 4G
内存 4~16G:Swap 至少 8G
内存 16G~64G:Swap 至少 16G
内存 64G~256G:Swap 至少 32G
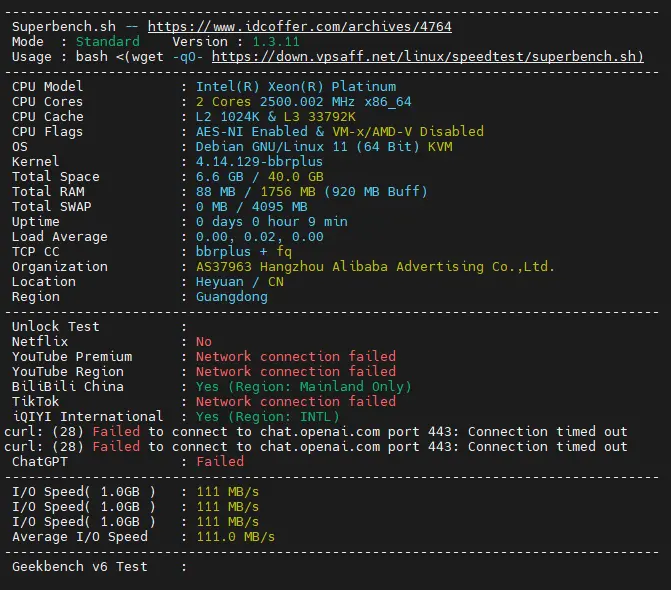
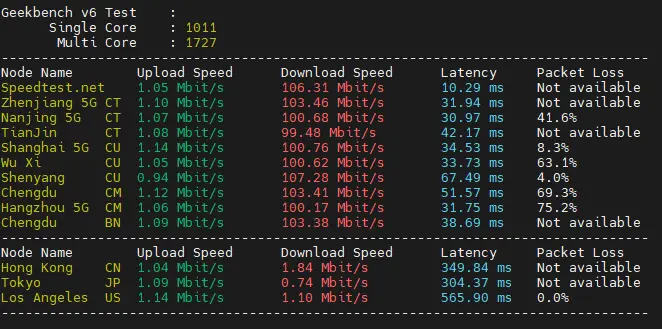
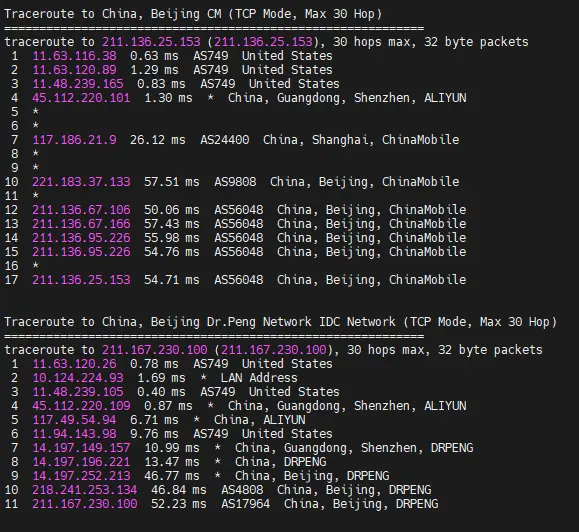
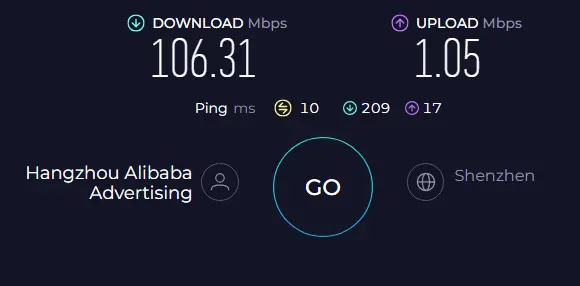
2.测试服务器性能
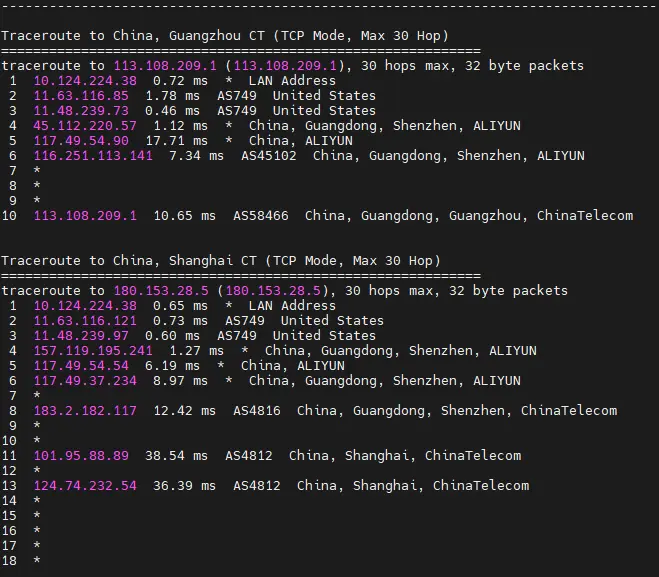
SuperBench脚本是一个测试linux服务器性能的脚本,让你快速方便了解一台服务器的综合性能,支持硬件基本信息、流媒体解锁检测、磁盘IO检测、CPU性能测试、以及国内和国外网络测速、网络路由追踪。
使用:
bash <(wget -qO- https://down.vpsaff.net/linux/speedtest/superbench.sh)

或
wget -qO- https://down.vpsaff.net/linux/speedtest/superbench.sh | sudo bash


3.安装docker docker-compose等常用软件
更改镜像源提速
由于 http://hub.docker.com 无法访问,更改国内镜像源。
阿里云镜像需要从阿里云后台看。
登录:cr.console.aliyun.com
点击“创建我的容器镜像”,得到专属加速地址。
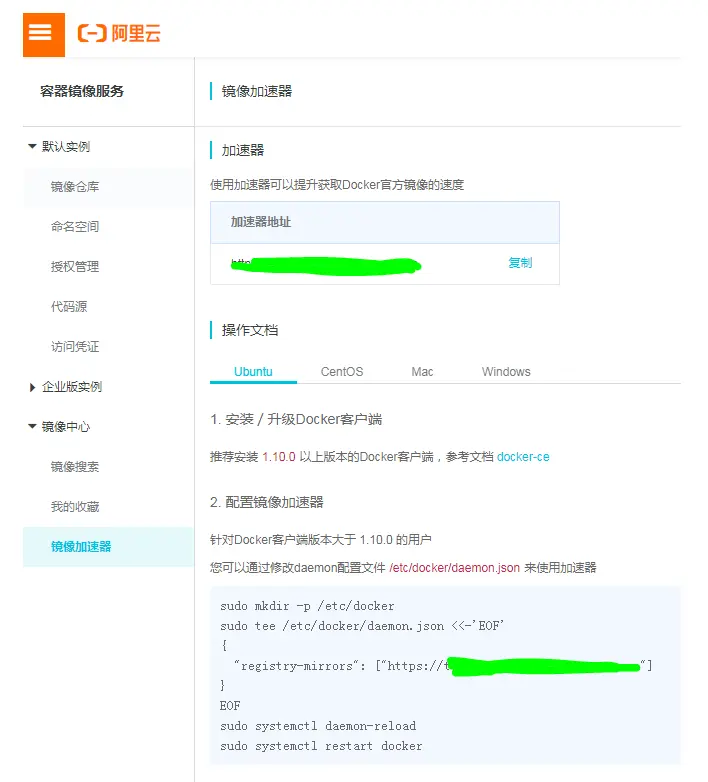
容器镜像
配置镜像
mkdir -p /etc/docker
vim /etc/docker/daemon.json
填入dcoker配置
{
"log-driver": "json-file",
"log-opts": {
 "max-size": "20m",
 "max-file": "3"
},
"experimental":true,

"registry-mirrors": [
"https://sokdt8pq.mirror.aliyuncs.com",
"https://v5iuyvw8.mirror.aliyuncs.com",
"https://dockerproxy.com",
"https://docker.nju.edu.cn",
"http://hub-mirror.c.163.com",
"https://docker.mirrors.sjtug.sjtu.edu.cn",
"https://docker.m.daocloud.io",
"https://docker.1panel.live"

]
}
```bash
systemctl daemon-reload  #重新加载docker配置
systemctl restart docker  #重启docker

查看是否成功
docker info
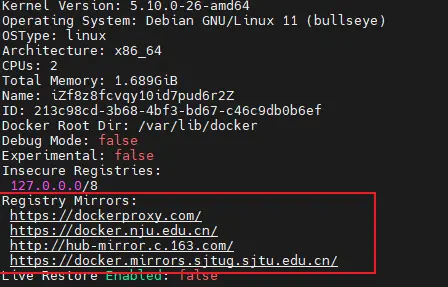
Docker Hub 镜像测速
# 测速前先移除本地的镜像!
$ docker rmi nginx:latest
# 使用 time 统计所花费的总时间。
$ time docker pull nginx:latest

Pulling repository nginx
[...]

real   1m14.078s
user   0m0.176s
sys    0m0.120s
安装 Docker(国内服务器)
curl -fsSL https://get.docker.com | bash -s docker --mirror Aliyun
```bash
docker -v  #查看 docker 版本
```bash
systemctl enable docker  # 设置开机自动启动
安装 Docker-compose(国内服务器)
curl -L https://github.com/docker/compose/releases/download/v2.29.7/docker-compose-`uname -s`-`uname -m` -o /usr/local/bin/docker-compose

chmod +x /usr/local/bin/docker-compose

docker-compose --version  #查看 docker-compose 版本

一键安装
# 一键安装命令
curl -fsSL https://github.com/tech-shrimp/docker_installer/releases/download/latest/linux.sh| bash -s docker --mirror Aliyun

# 备用(如果Github访问不了,可以使用Gitee的链接)
curl -fsSL https://gitee.com/tech-shrimp/docker_installer/releases/download/latest/linux.sh| bash -s docker --mirror Aliyun

# 启动docker
service docker start
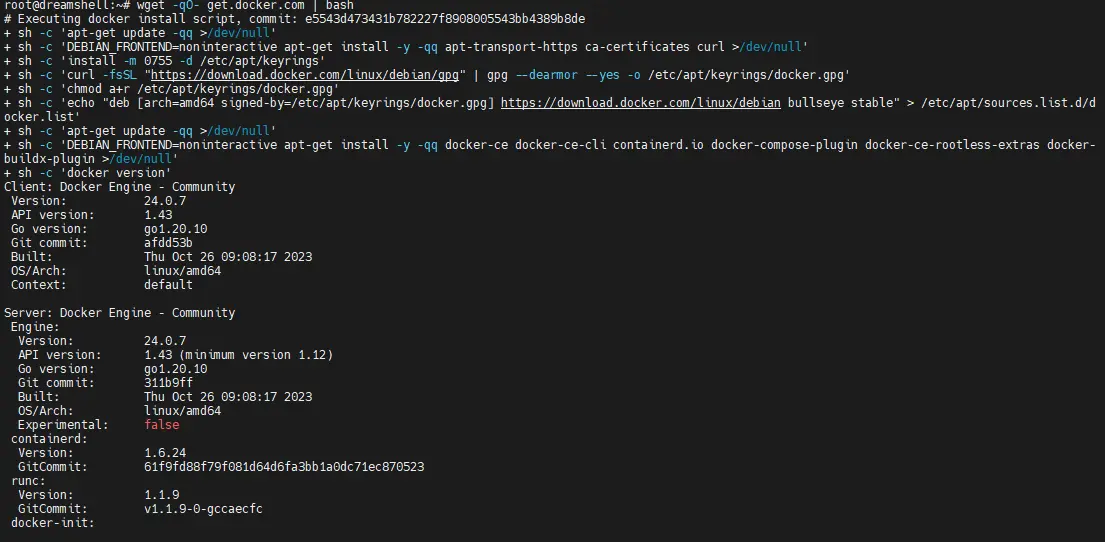
安装 Docker(非大陆服务器)
wget -qO- get.docker.com | bash
```bash
docker -v  #查看 docker 版本
```bash
systemctl enable docker  # 设置开机自动启动
安装 Docker-compose(非大陆服务器)
curl -L https://github.com/docker/compose/releases/download/v2.23.0/docker-compose-`uname -s`-`uname -m` -o /usr/local/bin/docker-compose
```bash
sudo chmod +x /usr/local/bin/docker-compose
```bash
docker-compose --version  #查看 docker-compose 版本


评论区